作者:汪晶晶
仪器简介
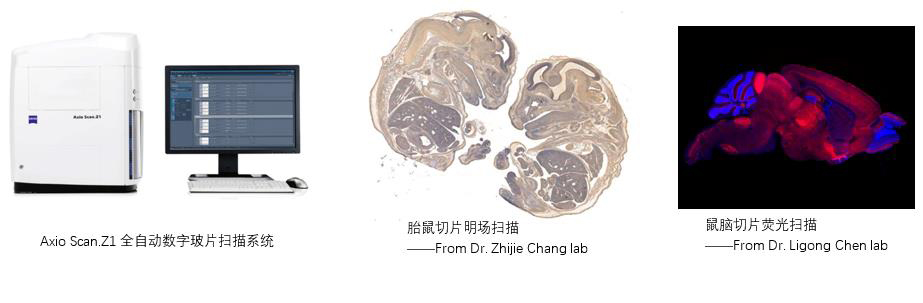
Zeiss全自动数字玻片扫描系统Axio Scan. Z1具有全自动明场、荧光和偏振光扫描等成像功能,可帮助研究人员对固定组织切片和细胞样本进行大批量、全组织、全自动的高速扫描,并可进行Z轴层扫和景深拓展计算。其“托盘”设计可实现一次性扫描100张玻片,环形光阑照明方式(Ring Aperture Contrast)可确保对荧光样本提供最大限度的保护。
本期主要介绍明场扫描profile的基本设置、保存与选用。
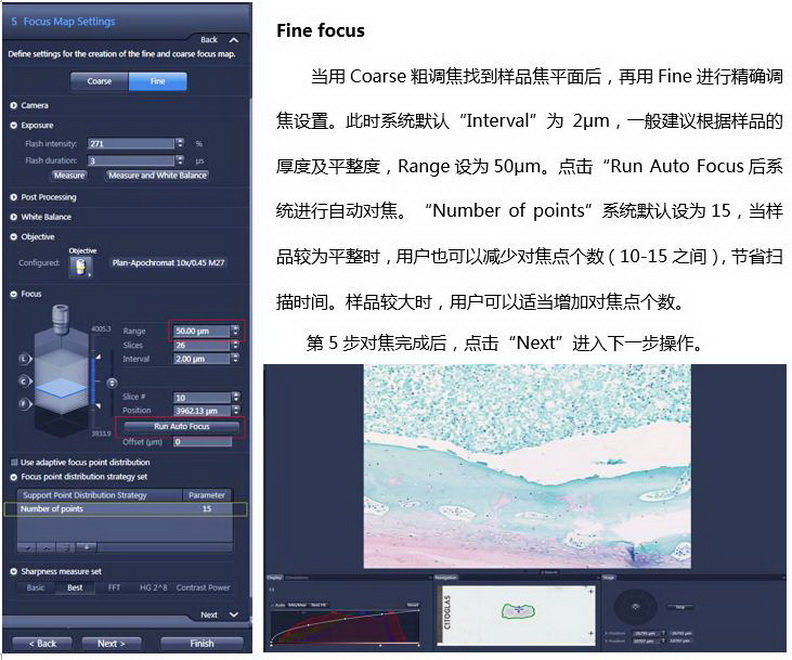
1. 明场(Bright field)profile基本设置
1.1 选择样品的拍摄方式(profile)
明场拍摄默认profile主要有Default_BF_10X、Default_BF_20X、Default_BF_40X,通常情况下,选择Default_BF_10X、Default_BF_20X即可。下面以Default_BF_10X拍摄方式为例进行设置说明。
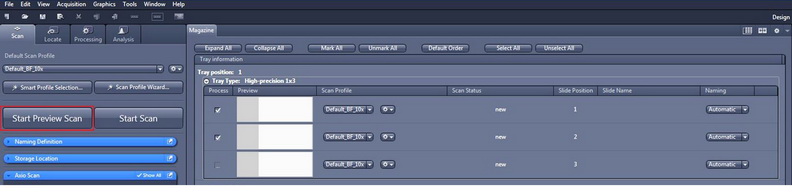
关闭Axio Scan.Z1的拱门后,将出现如下界面:在左侧下拉菜单中选择“Default_BF_10X”,单击样品预览区上方的“unmark all”取消所有样品的勾选,只勾选一张需要进行参数设置的样品即可,进行后续操作。

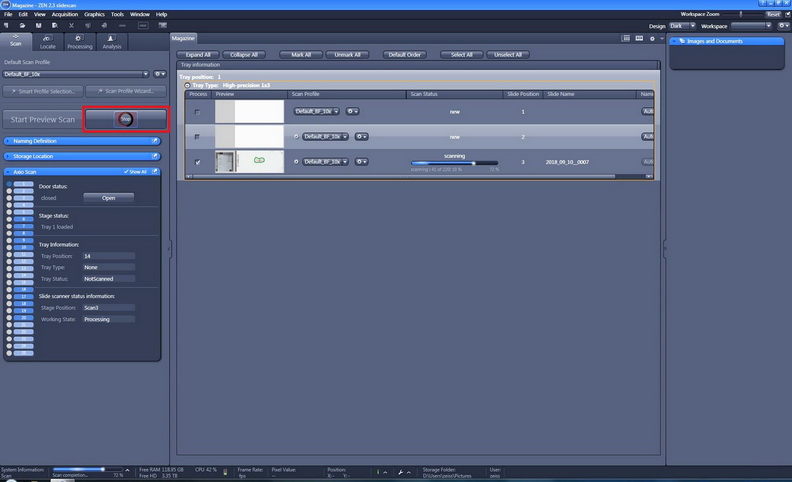
1.2 样品预览(preview)
样品勾选完成后,点击左侧“Start Preview Scan”,扫描仪将读取样品信息。
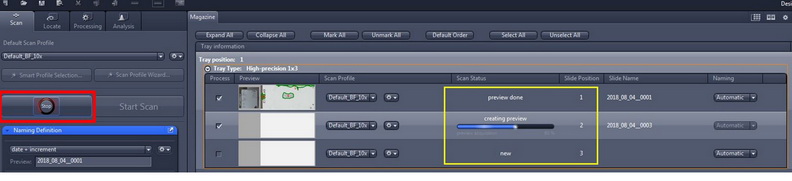
已完成扫描预览的样品,将显示“preview done”的状态(如下图样品1);正在扫描的样品显示“creating preview”(下图样品2);未进行扫描预览的样品显示“new”(下图样品3)。
1.3 明场扫描设置界面
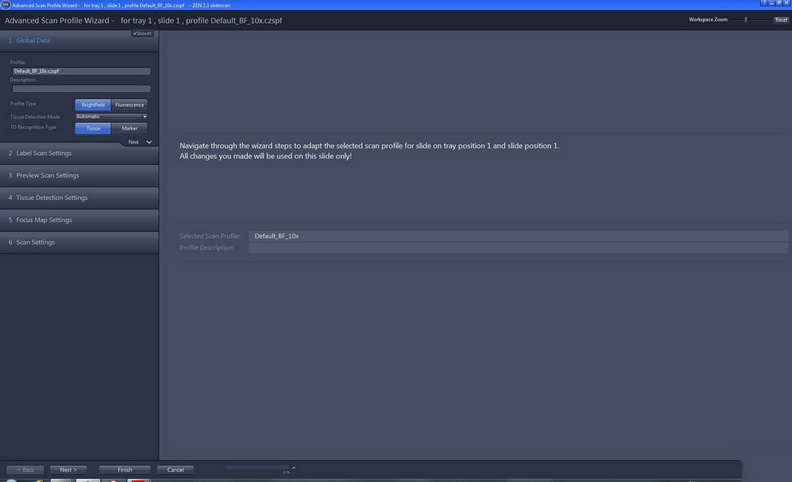
样品预览完成后,点击样品预览区中 下的“Open advanced wizard”(红色方框2)进行各项参数设置。
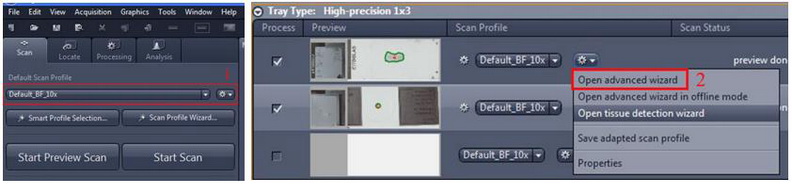
注意:步骤1中的profile(上图左红色方框1)中以“Default”为首命名的均为已设定好的默认方案,请用户不要擅自修改!
1.3.1 Global data
此步骤为系统已设定好的默认参数,可直接进行下一步操作。
1.3.2 Label Scan Settings
此界面可以设置标签区域的拍摄参数。一般情况下这些参数均无需修改,为默认最佳设置参数。如需修改标签图成像方向,可在“Label Orientation”下单列表中选择旋转角度,用户可随意拉动方框边缘调整到合适的标签图像采集区域。

1.3.3 Preview Scan Settings
此界面可以设置预览相机的拍摄参数。一般情况下为系统默认的最佳设置,用户也可以根据实际情况手动调节曝光时间(Exposure time)以及样品拍摄区域(下右图红色方框)。
注意:此步修改红框的位置后,样品需重新进行预览。

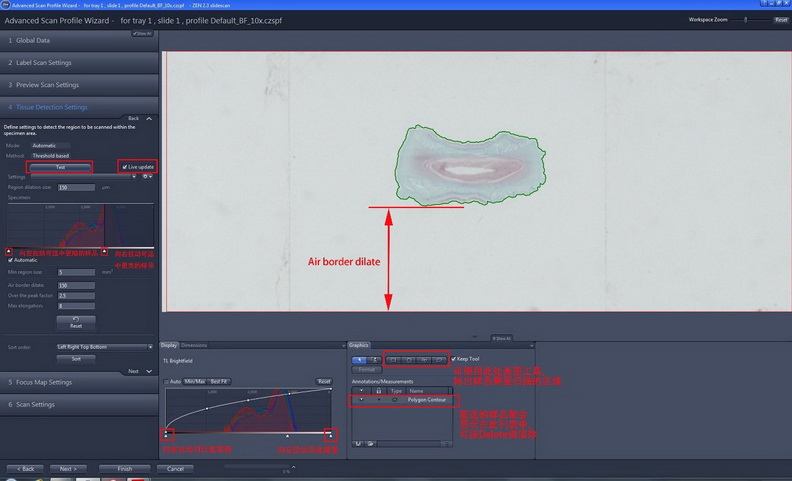
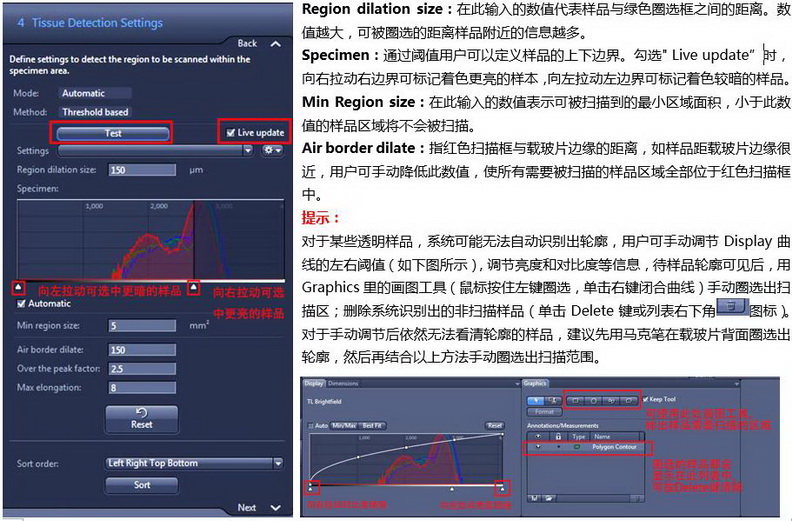
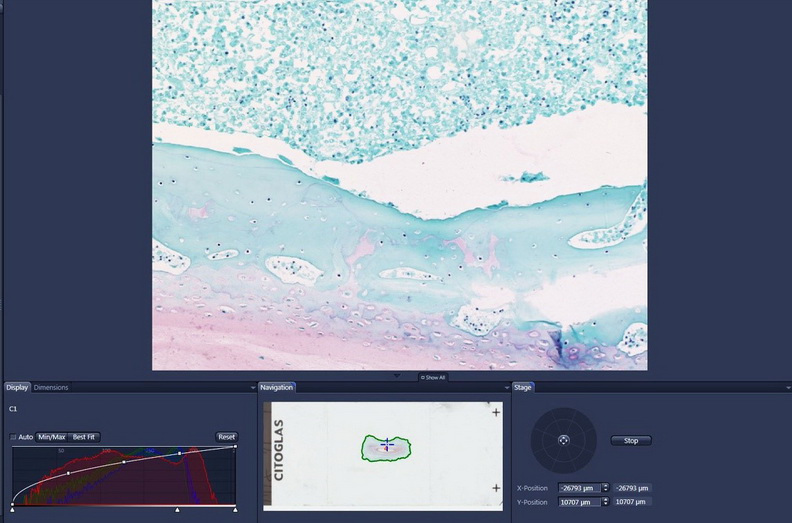
1.3.4 Tissue Detection Settings
此界面中绿色方框圈选的区域代表用户的感兴趣区域(ROI),只有在ROI中的区域才会被扫描。使用“test”按钮,软件将自动圈选出被检测到的样品(绿色边界内)。
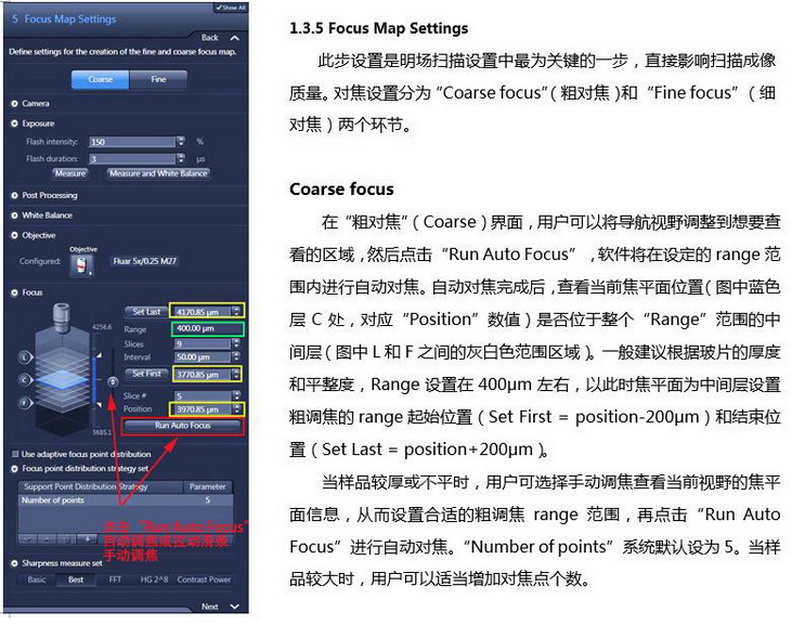
1.3.6 Scan Settings
在导航窗口(Navigation)点击玻片的干净空白处,点击界面左侧的“Measure and White Balance”调节白平衡,单击“finish”退出profile设置界面。
说明:白平衡调节一次即可,若感觉样品预览区对比度良好,可不进行此步操作。
1.3.7 Start Scan
点击页面左侧“Start scan”按钮,开始扫描。
2. 新建profile的保存与选用
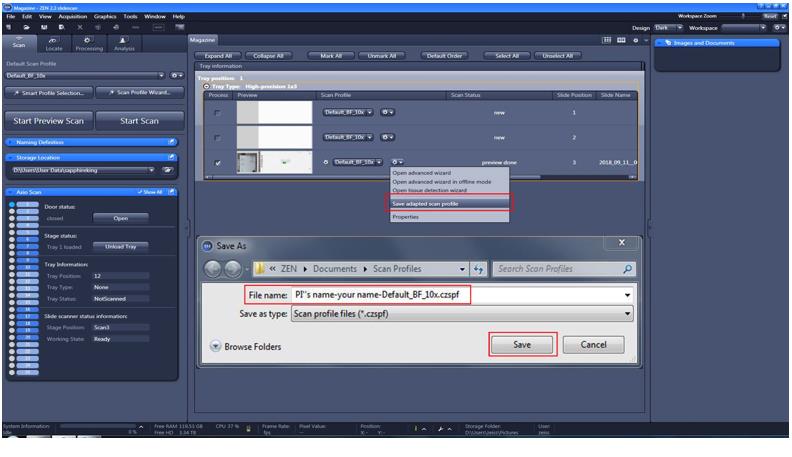
2.1 新建“profile”的保存
设置好profile后,如需要保存,请点击下图所示的“Save adapted scan profile”,在弹出的“Save As”对话框中以“PI’s name-your name-修改的默认profile”格式命名,点击“Save”。
2.2 新建“profile”的选用
一般情况下,刚刚保存的profile会在左侧profile列表的最下方找到,要应用此profile时,“Scan Status”的状态需显示为“new”,用户也可以选中需要修改的样品,单击右键,将扫描状态切换为“Resent Scan status to new”后,在左侧调用profile。

本文章版权归清华大学生物医学测试中心
细胞生物学平台所有